Lots of new technology has come to cycling in the past decade, and tubeless tires have been one of the highlights. Not only can they make us faster, but they also have self-healing abilities and come with many different tread patterns. However, sometimes a tubeless tire can break. Below, we’ll explore how to patch a tubeless tire while gravel biking.

Here at gravel biking, we get asked many questions about tubeless tires and their capabilities. Many people don’t know just how much tubeless tires can improve the cycling experience. In this article, we’re going to tell you everything you need to know by discussing:
Table of contents
What Is A Tubeless Tire?
A tubeless tire is a special kind of tire that is used on bikes and can help not just performance but reliability too. Instead of having an inner tube inside, you have sealant which keeps the air inside.
Tubeless tires originally started on mountain bikes but eventually came across to road and gravel bikes. They come with many advantages, making them one of the popular options for gravel cyclists.
Tubeless Tires Features
Here are some key features of tubeless tires:
Lighter
Tubeless tires are generally lighter compared to a setup with tubes. The weight of a standard tube is around 150g compared to the sealant weighing roughly around 40g. This is a saving of up to 200g plus on the bike.
Lower Pressures
Tubeless tires can be run at much lower pressures without the risk of pinch flats. This makes them excellent for off-road riding and perfect when it comes to getting a little more grip out of tire tread on a sketchy course.
Self Healing
When tubeless tires are punctured, the sealant leaks out and then hardens, plugging the hole, providing it’s not too big. This is an amazing advantage because you can get punctures but still continue to ride, then when you stop, add some air later.
Repairable
Tubeless tires are very repairable. Not only can they self-heal, but they can also be plugged with a tubeless repair plug. Failing those two solutions, you can even just put an inner tube in and continue to ride. They are the perfect choice for long-distance off-road adventures.
Related Reading: 6 Best Gravel Bike Carbon Wheels
Is It Worth Going Tubeless On A Gravel Bike?
Tubeless tires are the best way to go when it comes to gravel biking. The ability to run lower pressures and the self-healing properties makes it perfect for off-road trails and rough terrain. It’s the choice of the majority of gravel riders, and professional races tend to see most bikes running tubeless tires.
Can Tubeless Bike Tires Be Patched?
Yes, tubeless tires can be patched in two ways. The first is using what we call a plug. This is where if the hole is too big to seal itself, we use a plug kit to force some rubber compound inside, not just stopping the air from leaking but also giving it the ability to heal. This is generally considered a temporary solution but does have the ability to last a very long time.
The second way to patch, and typically something you might do after a temporary plug solution, is to patch permanently. This is where you remove the tire and apply a patch to the inside, which glues in and creates a more permanent seal.
Either way, knowing how to patch a tubeless tire while gravel biking is a useful skill. You never know what will happen on the road!
How Long Do Tubeless Tires Last After Puncture?
Tubeless ready tires, after a puncture, have the ability to last for a very long time. Instead of just using a plug, we recommend doing a permanent fix and patching from the inside when possible at home. Tubeless tires can continue to last thousands of miles if treated properly.
Related Reading: Gravel Bike Wheels: 700c vs 650b
How Do You Fix A Flat On A Tubeless Gravel Bike?
Fixing a flat on a tubeless system is an easy, easy task. We will tell you how to make a temporary fix after a permanent solution. Get a puncture while out on a trail? Here’s how to patch a tubeless tire while gravel biking:
- Tubeless Plug Kit (Tire Plugs)
- Pump
- Tubeless Patch Kit With Glue
- Tire Sealant

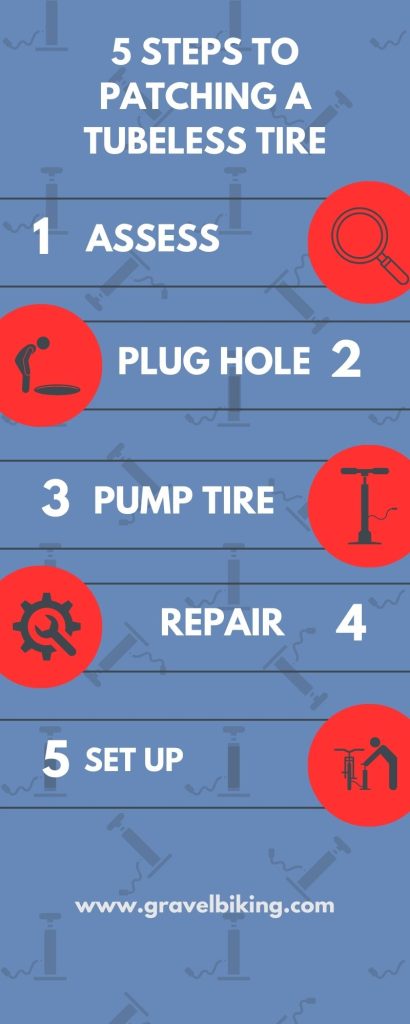
Step One: Assess The Puncture
You might find while out riding, your tubeless tire will go flat, and the ride will get a little bit rougher for you. Or you might hear the strong hiss of sealant and feel a light spray on your leg.
Either way, this means that you are more than likely you are going to need to stop to assess the damage to your tire, because you have probably had a tubeless puncture.
Although tubeless catches the holes most of the time, there are times when you’re going to need to plug the hole to ensure it stops leaking. You can tell if this is one of those times if the hole is more than 5mm.
Step Two: Plug The Hole
You might have now established that you’re going to need to do some repairs. Start by going to the hole and removing any rocks or dirt that might be in there. After you have done that, take the plug tool, and then you will need to insert the compound into it.
Now we must use the tool to press the compound into the tire. It might take some pressure, but the way the tool is designed, as soon as the compound is in, when you remove the tool, it leaves it in the tire. It should now be sticking out the tire and blocking the hole. Don’t be scared to use two tubeless plugs if required.
Step Three: Pump Up The Tire And Ride
Now it’s time to pump up the tire to get some air back in there. If you’re on the road, you might end up having to use a hand pump which could take some time. You also might find some sealant might still leak out. Putting the hole at the bottom can help the sealant get to it and seal it.
It’s not the worst idea to get the pump straight off and start riding, as this will help the repair seal. After a couple of miles, it’s worth checking that there’s still a good bit of pressure in there and that you’re not hitting the wheel rim.
Providing its holding pressure, take the smaller cutter out of the tubeless repair kit and cut the excess of the compound off. We always wait to cut this off in case we need to push more of the compound in to help seal it after a test.
If you find the tire keeps going down, and the hole won’t plug, you should put an spare tube inside until you get home.
Step Four: Repair The Tire
Now you have gone home, and you’re in a better environment. We can repair the tire properly. Although a plug can get you home or even give you many rides, it’s not always a permanent fix. That’s why we must properly repair the tire using a tubeless patch.
Start by deflating the tire and remove it from the rim. Then we’re going to need to clean the tire up and remove as much sealant as possible and use a cloth to dry out the inside of the tire. You might want to leave it outside for a bit to let it dry out.
Now you will want to sand down the rear of the tire where the hole is. The better you can do this, the stronger the repair will be. Once you have done this, spread some glue on, add the patch or tire boot, and hold it on tight until it dries to the tire completely.
Step Five: Set Up The Tire Again
Next, we need to get the tire set back up again. Add the tire onto the rim, and when half on, add some tubeless sealant into the tire, then get the rest on. You can also seat the tire and add the tire sealant through the tubeless valve. Then use a track pump to seat the tire by adding the correct pressure. You will hear the tire ting when it has set itself.
At this point, you will want to spin the tire around to ensure the tubeless sealant gets around all the edges and seals the tire. Taking it out for a ride is a good idea to help it sit, this is also a great excuse for a bike ride and a coffee on the road. You’re done!
Related Reading: Bags for Gravel Bikes
Are Tubeless Repairs Permanent?
Tubeless repairs are not always permanent, but they do last a fair amount of time if done correctly. Although it will seal the damage and it is going to work as it did before, that area of the tire won’t be as strong. After a few repairs and some decent miles, we recommend changing your tire, but they are designed to take a repair or two from tubeless repair kits.
How Often Do You Need To Put Sealant On Tubeless Tires?
It’s very important to stay on top of the sealant when it comes to a tubeless system. That’s what gives it all the benefits, and without sealant, you won’t have a very pleasant experience. I recommend if you lose no sealant through punctures, add more every six months.
If you do get a few punctures, it’s good to top a little after each to ensure there’s enough inside. You can do this by add sealant through the valve stem, try to avoid removing the tire in this case.
Is It Safe To Patch A Tubeless Tire?
In our opinion, knowing how to patch a tubeless tire while gravel biking is a valuable skill. It’s important to understand that when you do, at that small point, the tire will be a little weaker compared to an undamaged point. It’s ok to do so, but once you have made a few repairs, considering some new rubber is a good idea.
Tubeless technology is amazing and it has proven itself for a mountain bike and it’s doing the same on a gravel bike. We highly recommend running a tubeless setup as it offers so many advantages, just don’t forget the repair plugs.
